
Introduction: Why Rain Gardens Matter in Southeast Seminole Heights
As Southeast Seminole Heights continues to grow, local homeowners are looking for creative ways to beautify their yards while tackling persistent flooding and runoff issues. Enter the rain garden—a carefully designed, shallow depression planted with native vegetation that captures and filters stormwater before it can overwhelm drains or pollute the nearby Hillsborough River. Rain gardens don’t just help manage water: they attract butterflies, reduce erosion, and add eye-catching curb appeal. Yet, many residents are unsure where to start. This guide breaks down each step to creating a thriving rain garden in Southeast Seminole Heights, with advice on site selection, drainage, native plant choices, and ongoing care. Whether you’re a seasoned gardener or a DIY beginner, you’ll find practical, locally relevant tips for turning your rainwater problem into a lush, low-maintenance oasis.
Understanding Rain Gardens: The Basics and Local Benefits
What Is a Rain Garden?
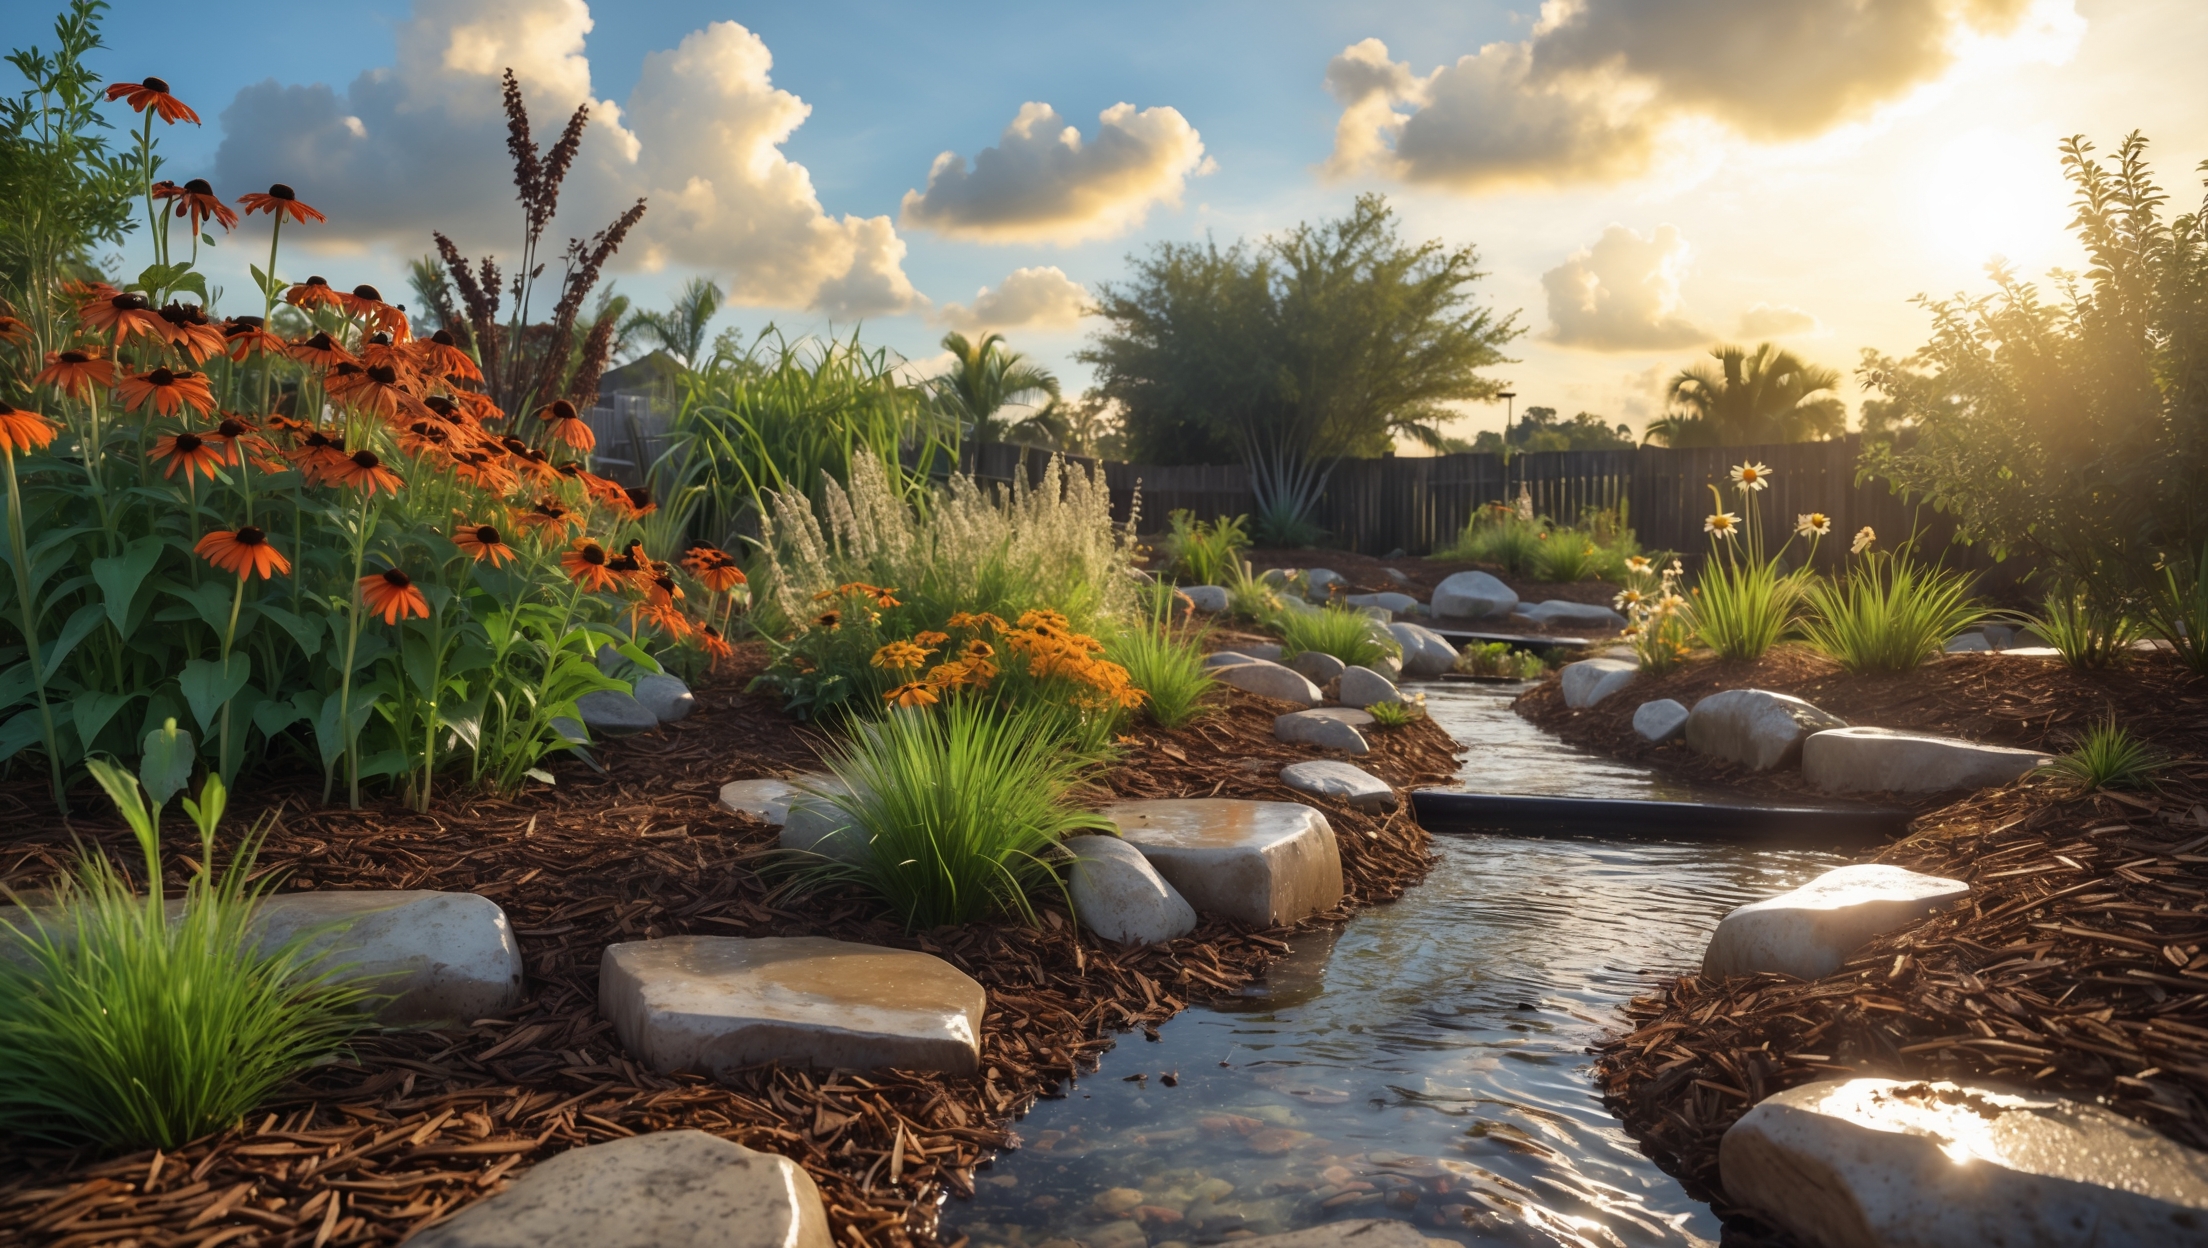
A rain garden is a shallow, bowl-shaped landscape feature designed to temporarily hold and soak in rainwater from roofs, driveways, or patios. Unlike a pond, rain gardens dry out between rains. Their deep-rooted plants help filter pollutants and encourage groundwater recharge.
Why Rain Gardens Work in Southeast Seminole Heights
- Frequent Heavy Rains: Tampa’s summer downpours can flood yards and streets. Rain gardens capture runoff before it causes problems.
- Sandy Soils: The area’s sandy subsoil drains well, making it ideal for rain garden success.
- Biodiversity: Using local plants supports Southeast Seminole Heights’ pollinators, birds, and beneficial insects.
- Reduced Pollution: Filtering runoff helps keep local waterways cleaner.
Planning Your Rain Garden: Site Selection and Sizing
Step 1: Observe Your Yard’s Drainage Patterns
After a heavy rain, walk your property and note where water flows and pools. Ideal locations for a rain garden are:
- Downhill from downspouts or driveway edges
- At least 10 feet from home foundations and septic systems
- Not directly over buried utility lines (call 811 to check before you dig)
- In full or partial sun for best plant growth
Step 2: Calculate Size and Shape
Rain gardens are typically sized to capture runoff from a roof or driveway section. As a rule of thumb, aim for a garden area about 10-30% the size of the drainage area. For example, if your roof drains 600 sq. ft. toward one downspout, build a rain garden of 60–180 sq. ft.
- Shape: Kidney or teardrop shapes blend well with landscaping and maximize water capture.
- Depth: In Southeast Seminole Heights, a 6–8 inch depth is ideal for most gardens.
Soil Testing and Drainage Assessment
Step 3: Test Your Soil’s Infiltration Rate
Proper drainage is key. Here’s how to test:
- Dig a hole 8 inches deep and 6 inches wide in your chosen site.
- Fill with water and let it drain completely.
- Refill and time how long it takes to drain.
If water drains in 24 hours or less: Your site is suitable for a rain garden. If it lingers, consider amending the soil with sand and compost, or choosing a new spot.
Choosing Local Plants for Southeast Seminole Heights Rain Gardens
Step 4: Pick the Right Natives for Each Moisture Zone
Rain gardens have three moisture zones:
- Bottom (wettest): Handles standing water for a day or two after rain.
- Slope (moist): Drains quickly but stays moist longer than surrounding soil.
- Rim (driest): The outer edge, which dries fastest.
Recommended Native Plants
- Bottom: Blue Flag Iris (Iris virginica), Pickerelweed (Pontederia cordata), Swamp Milkweed (Asclepias incarnata), Soft Rush (Juncus effusus), Golden Canna (Canna flaccida)
- Slope: Dwarf Fakahatchee Grass (Tripsacum floridanum), Scarlet Hibiscus (Hibiscus coccineus), Sunshine Mimosa (Mimosa strigillosa)
- Rim: Black-Eyed Susan (Rudbeckia hirta), Blanket Flower (Gaillardia pulchella), Beautyberry (Callicarpa americana)
Choose plants in 1-gallon pots for fast establishment and arrange in groups for a natural look.
Materials and Tools Checklist
- Shovels and spades
- Wheelbarrow
- Rake
- Measuring tape and string
- Level (for checking slope)
- Mulch (pine straw or shredded bark)
- Compost and sand (for soil amendment if needed)
- Stones or river rock (optional, for edging or inlet protection)
- Native plants (see above)
- Garden hose (for shaping and testing water flow)
Step-by-Step: Building Your Rain Garden
Step 5: Outline and Excavate
Use a hose or string to outline your chosen garden shape. Remove turf or weeds, then dig the depression to the planned depth, sloping the sides gently. Pile excavated soil on the downhill side to form a berm, which will help contain water during storms.
Step 6: Amend the Soil (If Needed)
If your infiltration test was slow, mix 2–3 inches of coarse sand and compost into the bottom of the basin. Rake smooth and level.
Step 7: Create the Inlet and Overflow
- Inlet: Direct water from a downspout or swale into the garden using a shallow channel or buried corrugated pipe. Protect the entry with stones to prevent erosion.
- Overflow: On the low side, create a shallow notch or spillway lined with stones so water can exit safely if the garden overfills.
Step 8: Arrange and Plant
Place plants while still in their pots to plan your design—taller species at the center, shorter ones at the rim. Once satisfied, dig holes twice as wide as each pot and plant at the same depth as the container. Water in well.
Step 9: Mulch and Water
Apply a 2–3 inch layer of pine straw or shredded bark mulch to suppress weeds and retain moisture. Water thoroughly to settle the soil and mulch.
Local Tips for Southeast Seminole Heights Success
- Rain Barrel Integration: Pair your rain garden with a rain barrel to capture roof runoff and release it slowly, extending the garden’s benefit through dry spells.
- Neighborhood Collaboration: Team up with neighbors to create a series of rain gardens for even greater runoff reduction and shared plant sourcing.
- Check for Incentives: Hillsborough County periodically offers rebates or plant giveaways for stormwater management projects—check local programs before you buy.
- Monitor in First Year: The first growing season is critical. Water new plantings during dry weeks and pull weeds promptly.
Maintenance Best Practices
First Year Care
- Water deeply once or twice a week if rainfall is lacking.
- Remove invasive weeds as soon as you spot them.
- Top off mulch as it settles.
Annual and Seasonal Tasks
- Cut back dead stems in late winter to encourage new growth.
- Refresh mulch each spring.
- Inspect inlet and overflow for blockages or erosion after heavy storms.
- Divide crowded perennials every 2–3 years to maintain garden vigor.
Troubleshooting: Common Issues
- Poor Drainage: If water persists for more than 48 hours, aerate the soil or add more sand/compost mixture.
- Weed Invasion: Mulch heavily and consider planting groundcovers like Sunshine Mimosa.
- Plant Failure: Replace struggling plants with tougher native varieties that match the moisture zone.
Cost Breakdown and Budgeting
Rain gardens are a cost-effective upgrade, especially if you DIY. Here’s a sample budget for a 100 sq. ft. rain garden in Southeast Seminole Heights:
- Soil amendment (compost, sand): $40–$60
- Native plants (15–20 one-gallon pots): $120–$200
- Mulch: $30–$50
- River rock and stones (optional): $50–$100
- Tools (if not already owned): $0–$75
- Total estimated cost: $240–$485
Tip: Many local nurseries offer discounts for Florida native plant purchases, especially for environmental projects.
Permits and Compliance
Rain gardens generally do not require permits in Southeast Seminole Heights if they are less than 500 sq. ft. and do not alter natural watercourses. However, always:
- Call 811 before digging to locate underground utilities
- Check your HOA or neighborhood association guidelines
- Consult Hillsborough County’s Environmental Services for larger projects or if you plan to direct runoff from hard surfaces
Local Case Study: A Southeast Seminole Heights Success Story
Linda and Marcus, residents near Giddens Park, transformed a soggy corner of their backyard into a vibrant rain garden after noticing standing water after every summer storm. By following these steps and choosing Blue Flag Iris, Soft Rush, and Blanket Flower, they reduced runoff, eliminated persistent puddles, and now enjoy a thriving habitat for butterflies and songbirds. Their rain garden became a neighborhood inspiration, leading to a community planting day the following spring.
Conclusion: Building Your Rain Garden Legacy
Creating a rain garden in Southeast Seminole Heights is more than a landscaping project—it’s an investment in your home, your neighborhood, and your local ecosystem. By following this step-by-step guide, you’ll not only solve drainage issues but also foster biodiversity, support pollinators, and reduce your environmental impact. The process is approachable, budget-friendly, and customizable for yards of all sizes. Remember, the most successful rain gardens evolve over time, as plants mature and you discover which species thrive in your microclimate. Lean on local resources, share your progress with neighbors, and consider connecting with local gardening groups for plant swaps and advice. With a little planning and care, your rain garden will become a lasting legacy, adding value and beauty to your property while helping Southeast Seminole Heights stay resilient and green for generations to come.